


How to setup your email signature in Salesforce

Install your HTML email signature in no time! Use our signature installer or follow our step-by-step guides to install your email signature in Salesforce.
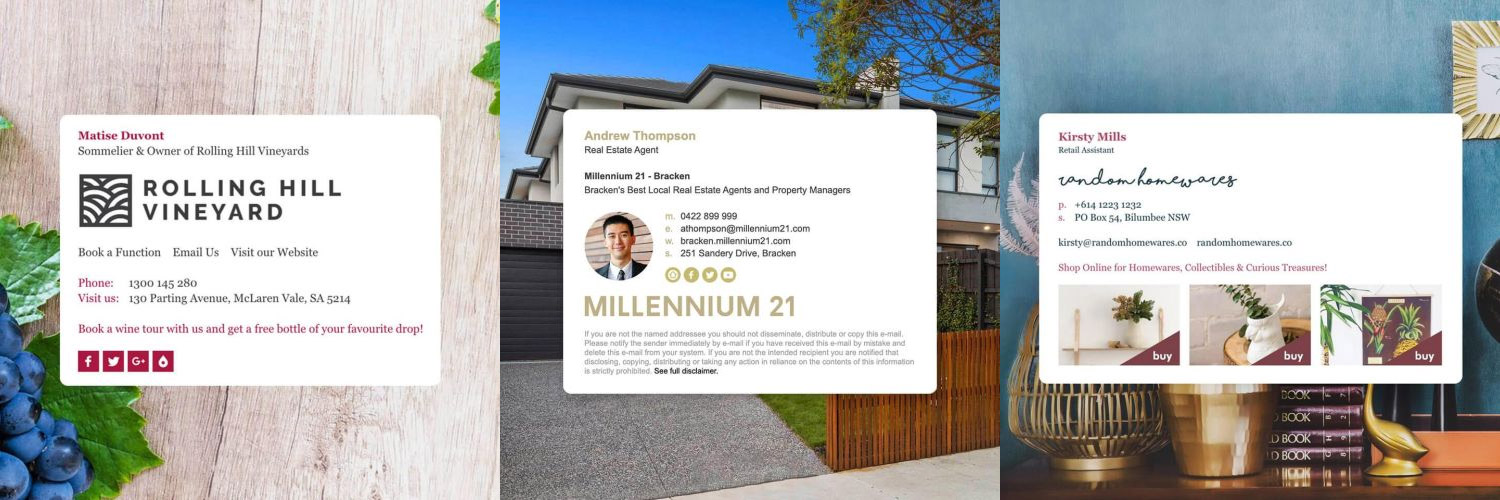
It's never been easier to create a new email signature for Salesforce. Check out our beautiful email signature templates and easy to manage email signature software, that makes creating email signatures for Salesforce a breeze.
Before you start
Before you start
- Login to your Salesforce account.
- Ensure you have your HTML email signature file open in your web browser
Next Step
When you have completed the above steps, click on Install: Step-by-Step Guide below to follow our written installation guide with screenshots.
If you run into any issues during your HTML email signature installation in cPanel, please see the Troubleshooting FAQ for frequently asked questions before contacting support through your member account.
Install: Step-by-Step Guide - Lightning Force UI
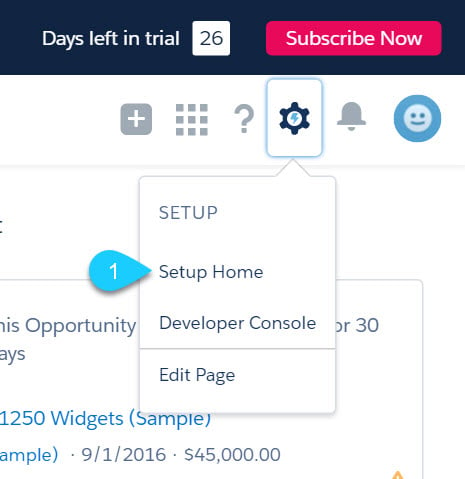
1Step One
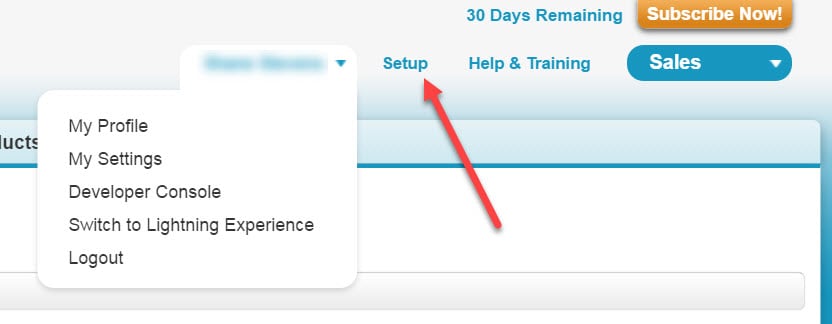
Login to your Salesforce account and create a new Letterhead. To do this, select the Settings icon from the top right menu, then select Setup Home..
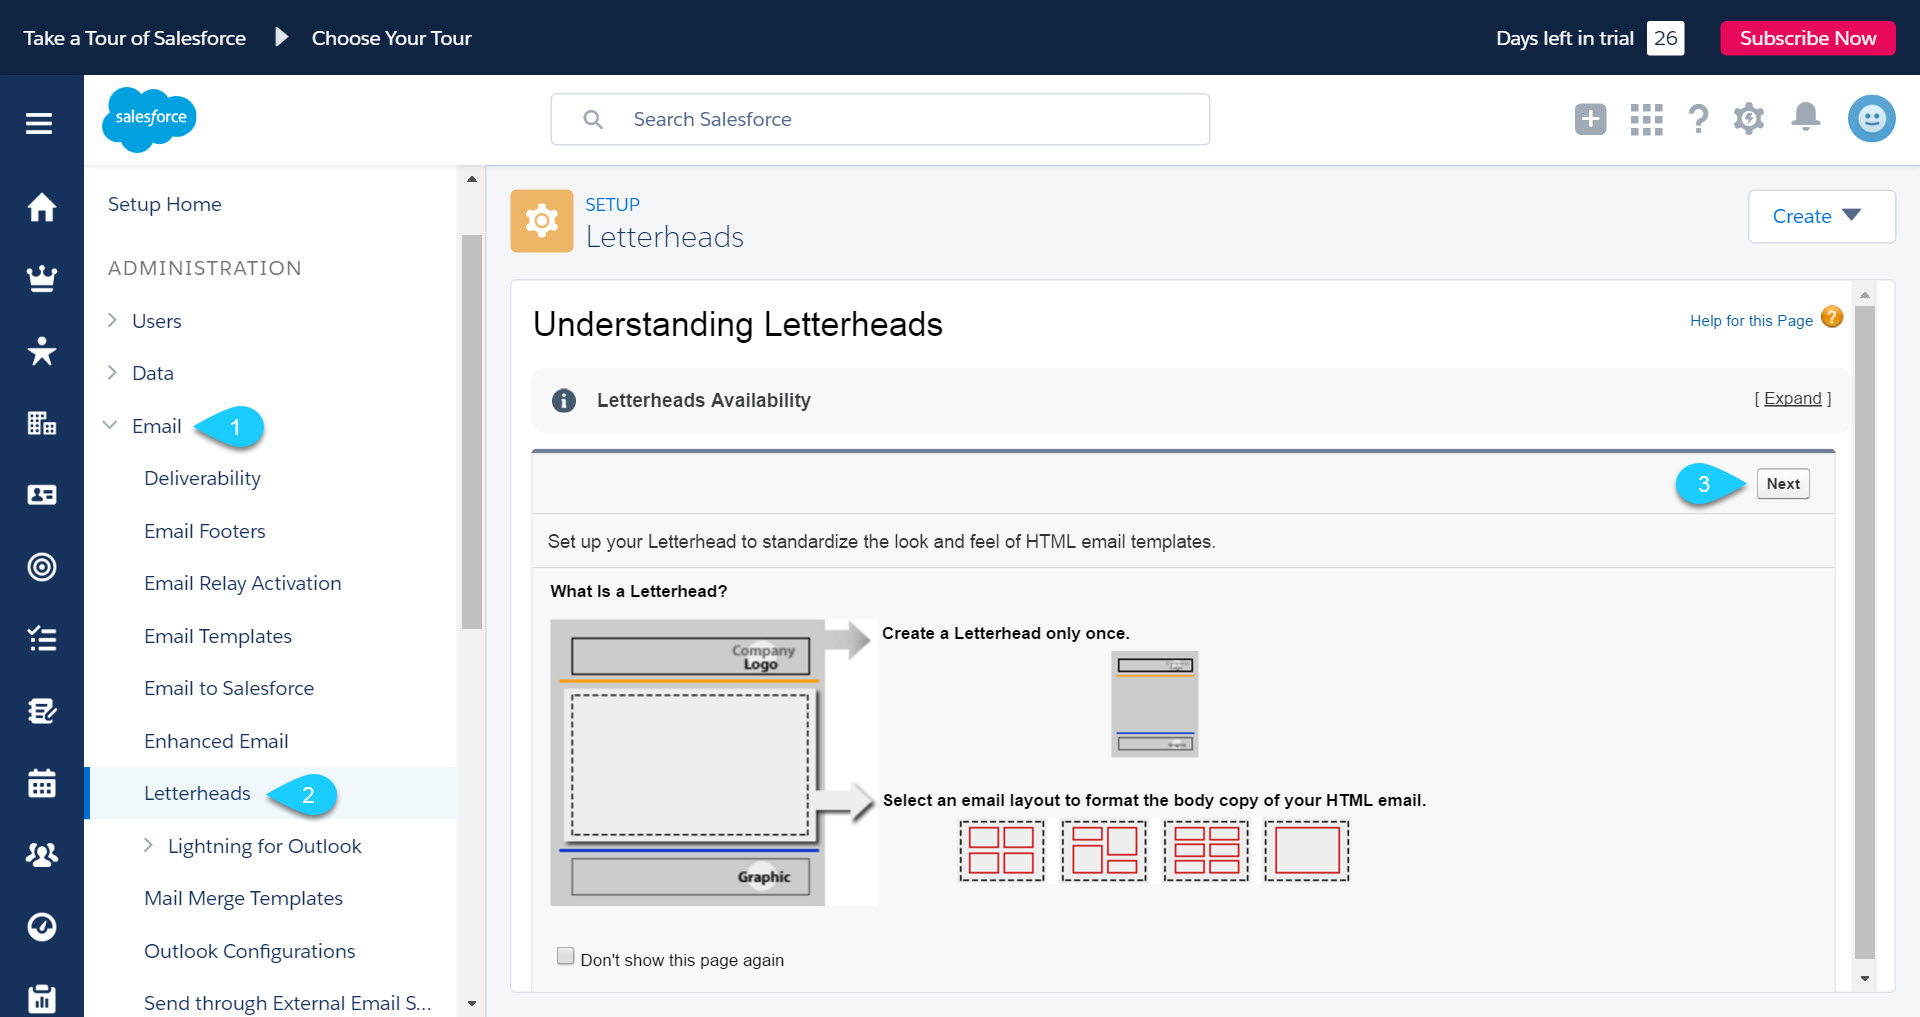
2Step Two
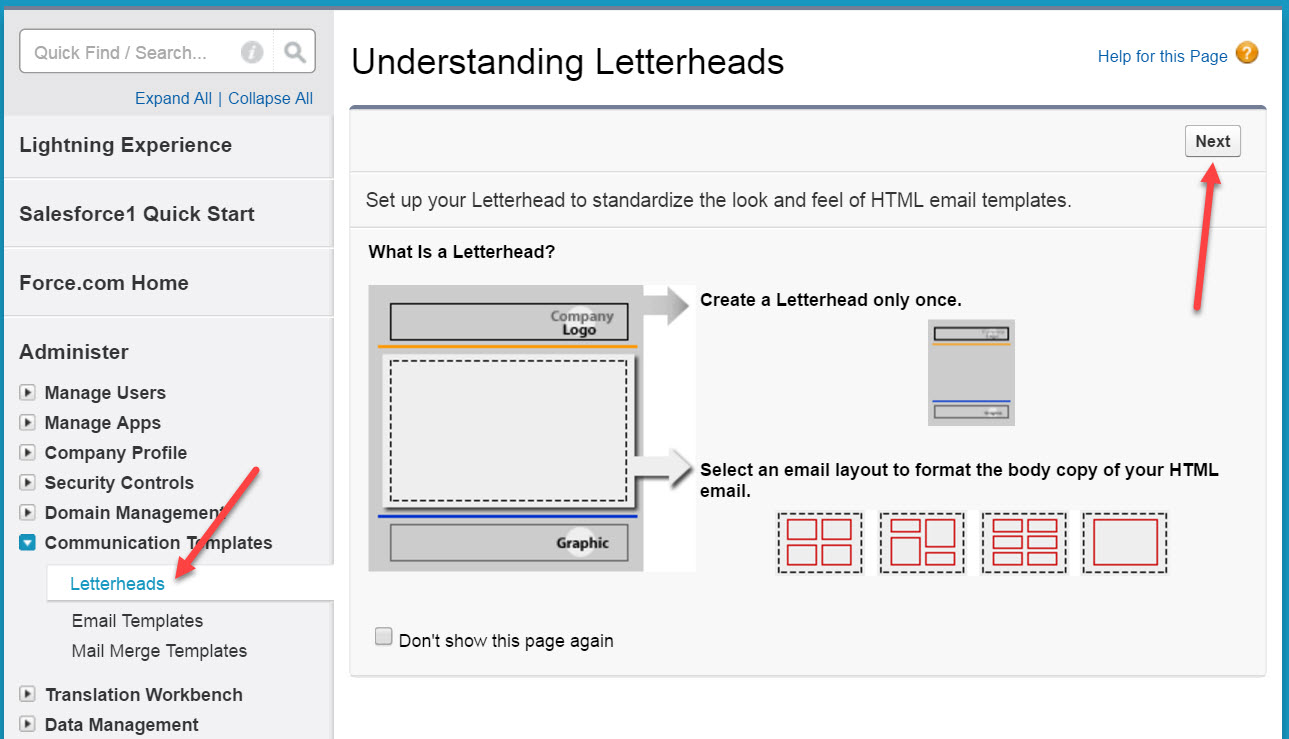
From the menu on the left hand side, underneath Administration select Email then Letterheads. You may see a screen that says Understanding Letterheads, click Next on the right-hand side.
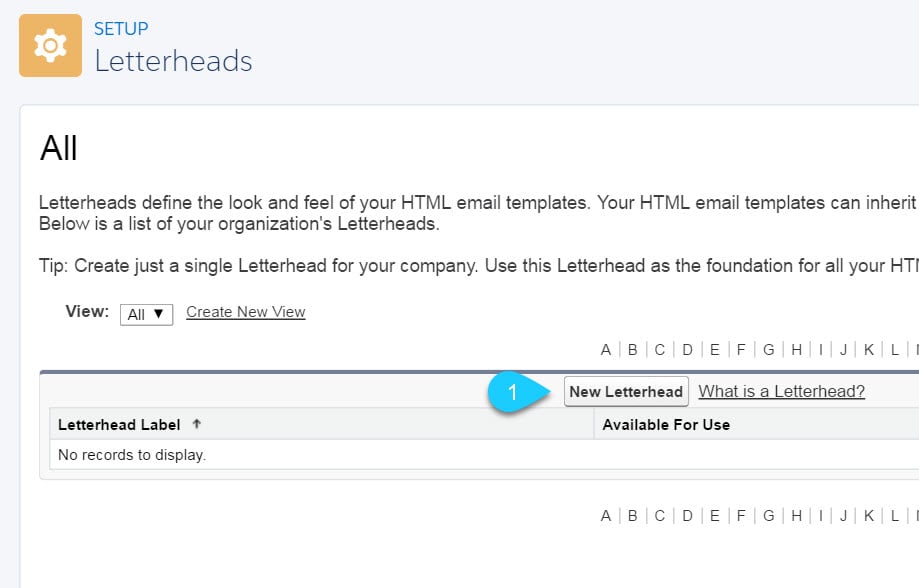
3Step Three
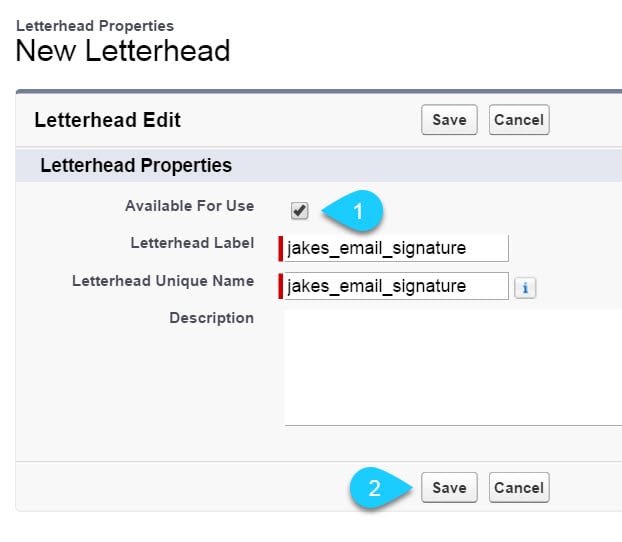
Create a new letterhead. Give it a label and a name and make sure to tick the Available for use checkbox.
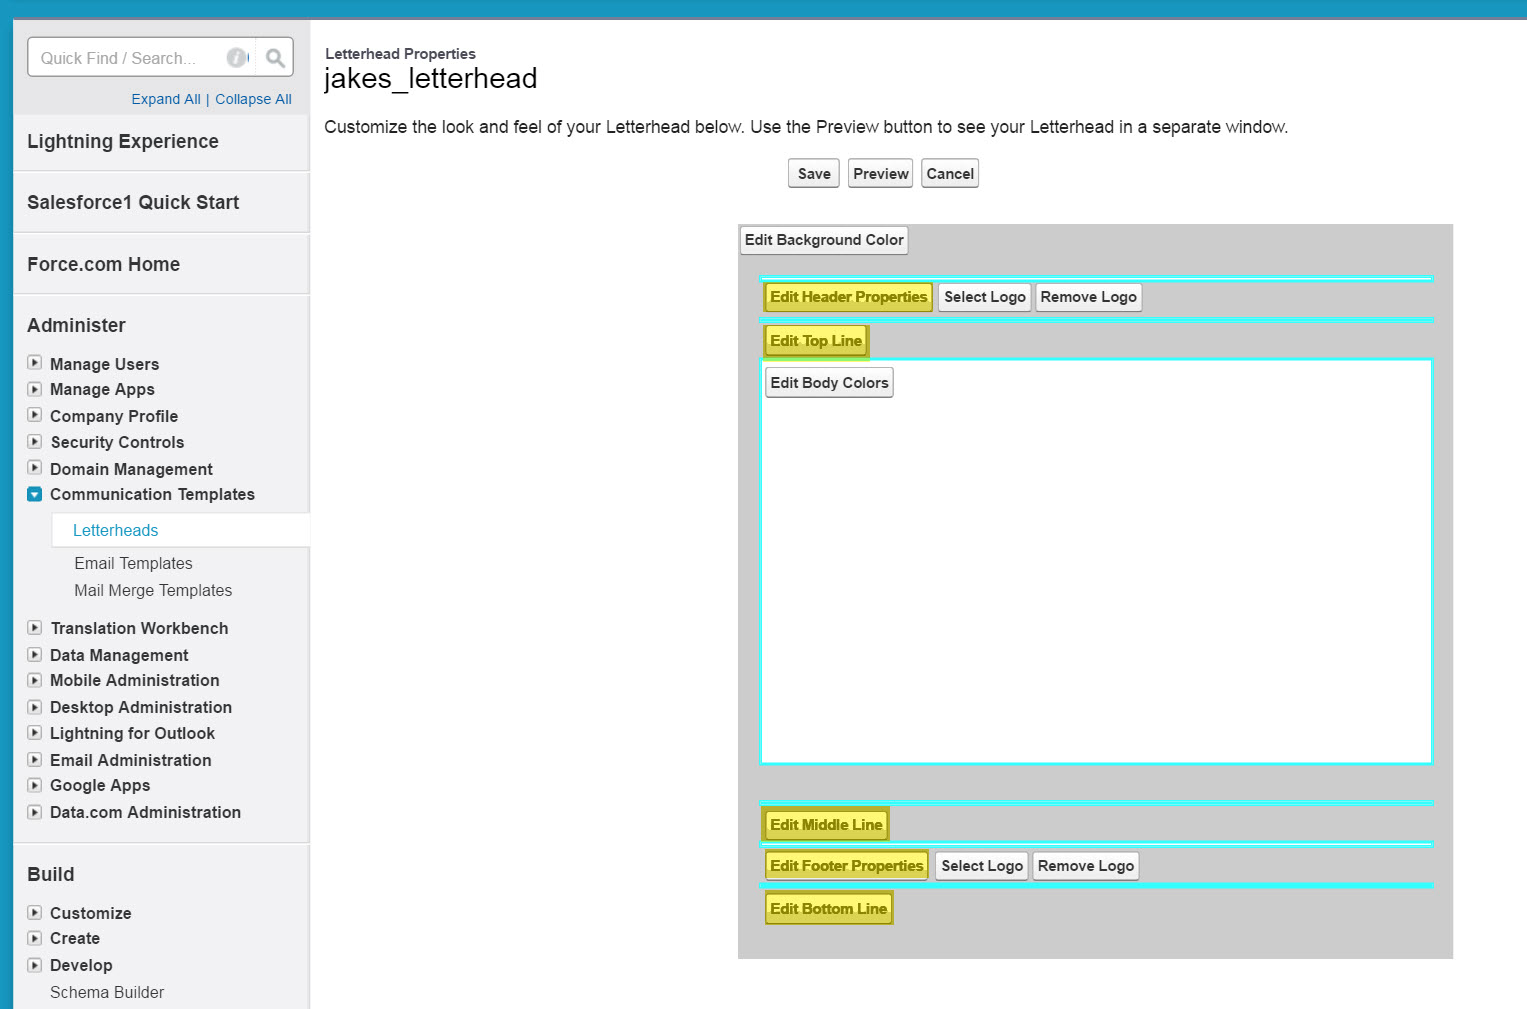
4Step Four
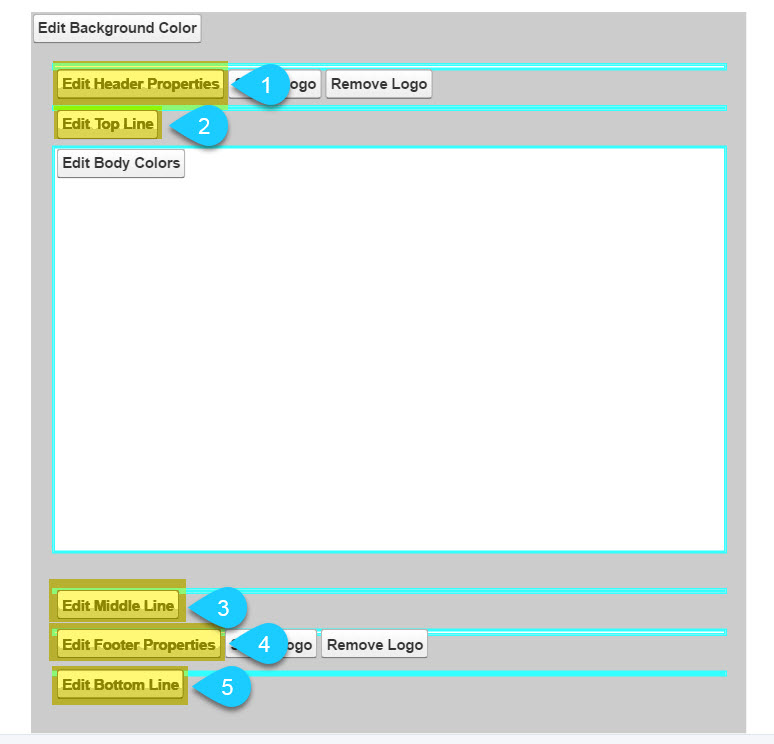
Edit all of the available options including the Header, Top Line, Middle Line, Footer and Bottom Line and make each one white by typing #FFFFFF for the background color in the boxes available. Set the Height (in pixels) of the Header and Footer to zero. This is important as you don't want any extra lines or colors on your nice email signature! Now save your letterhead.
5Step Five
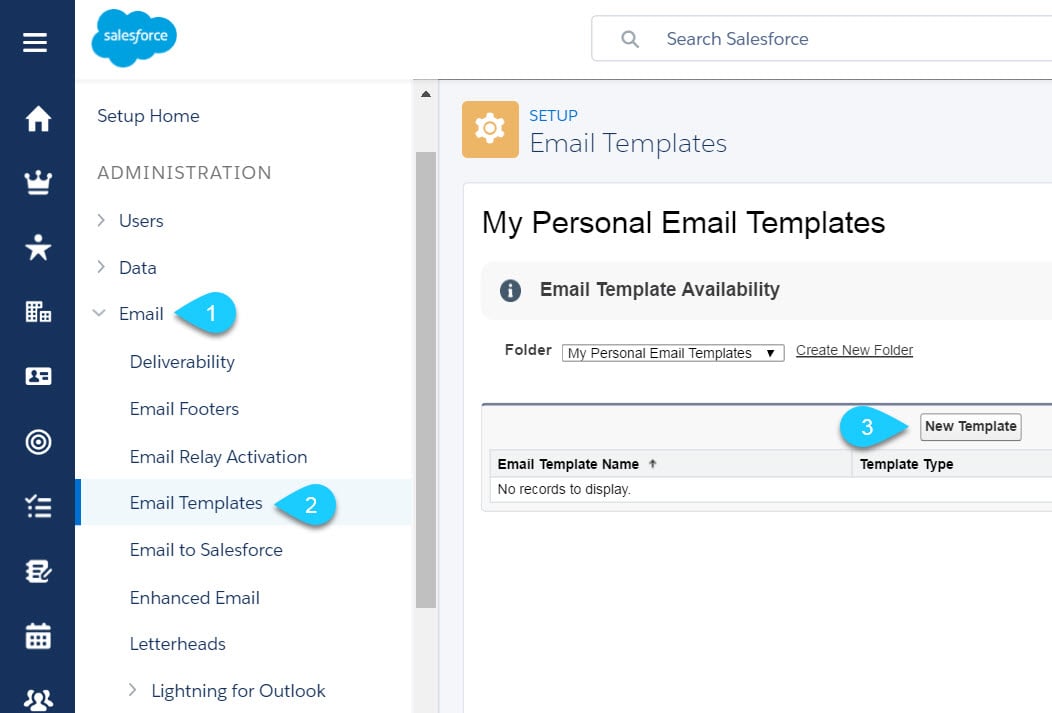
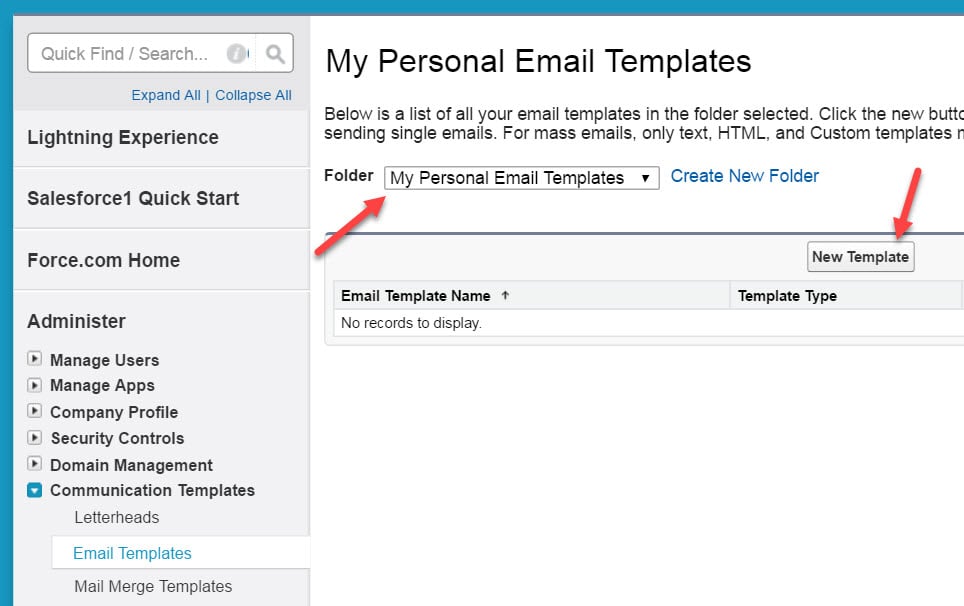
Now that you have a Letterhead you can build your Email Template. From the left menu click on Email Templates. Select My Personal Email Templates from the dropbox box, then click New Template to create a new one.
6Step Six
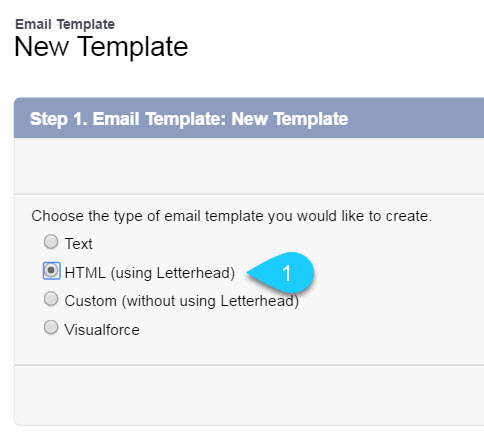
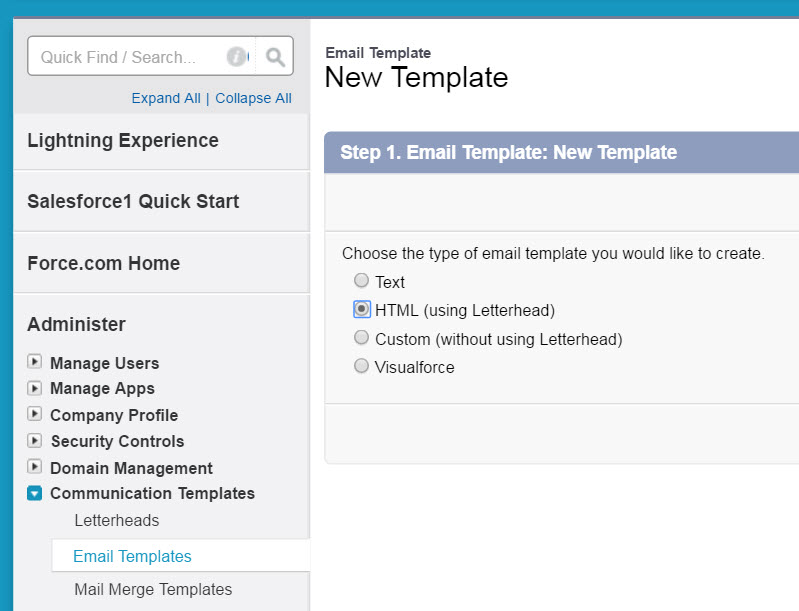
Choose HTML (using Letterhead) from the options.
7Step Seven
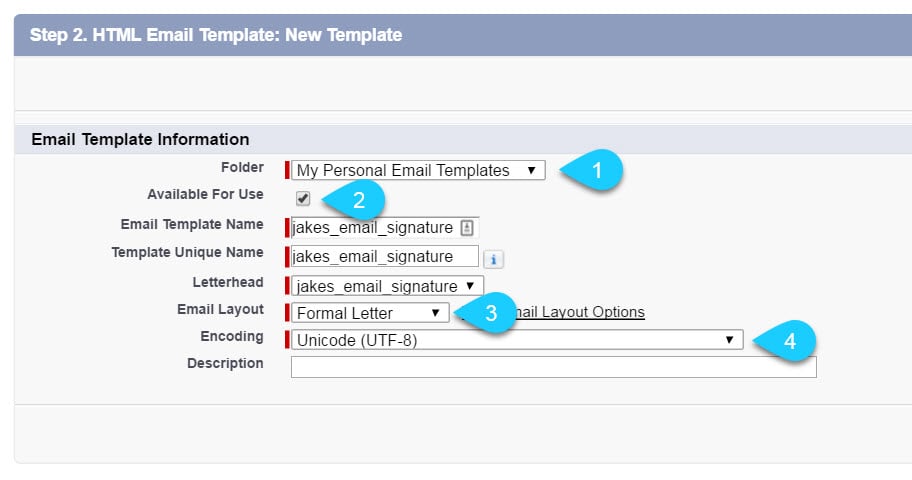
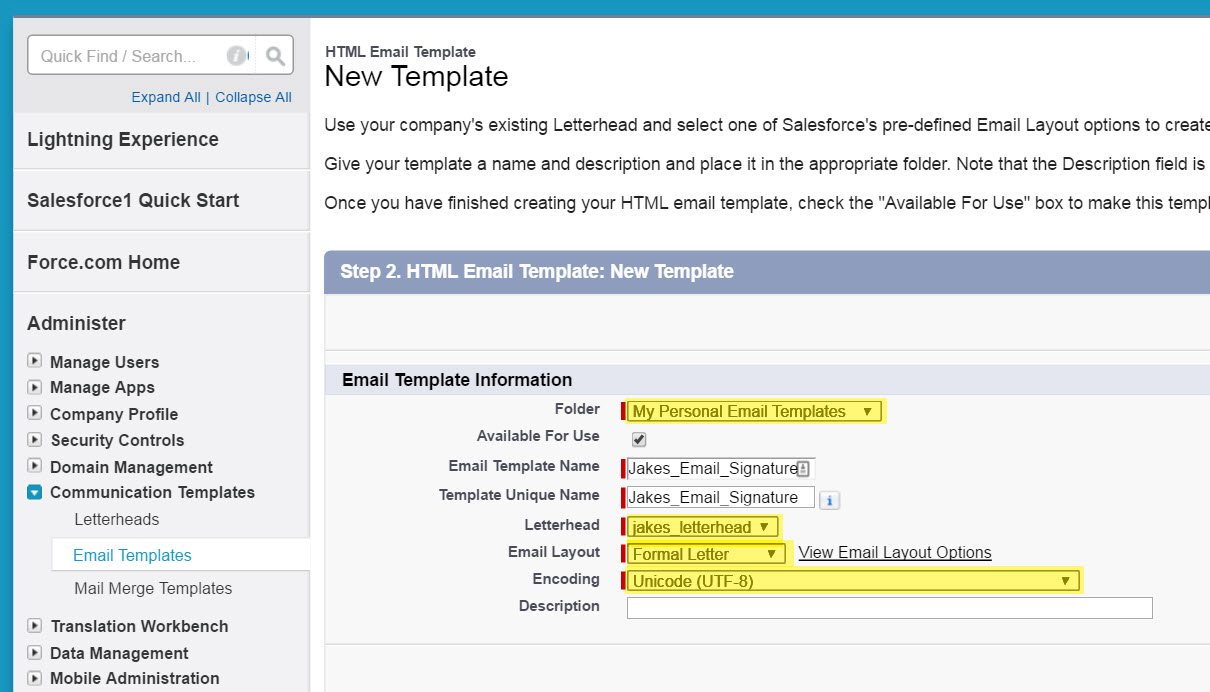
Choose the "Personal Email Templates Folder", tick the Available for Use checkbox, give your template a new name and unique name, make sure to select the Letterhead that we just created and under Email Layout and select the Formal Letter option. Finally, select Unicode (UTF-8) as the Encoding option, this has the widest compatibility of all of the options and is what our email signatures use. See image below for exact requirements.
8Step Eight
Switch out of Salesforce and open you email signature in your web browser. Once open, press Ctrl + A to select all, then Ctrl + C to copy the signature.

9Step Nine
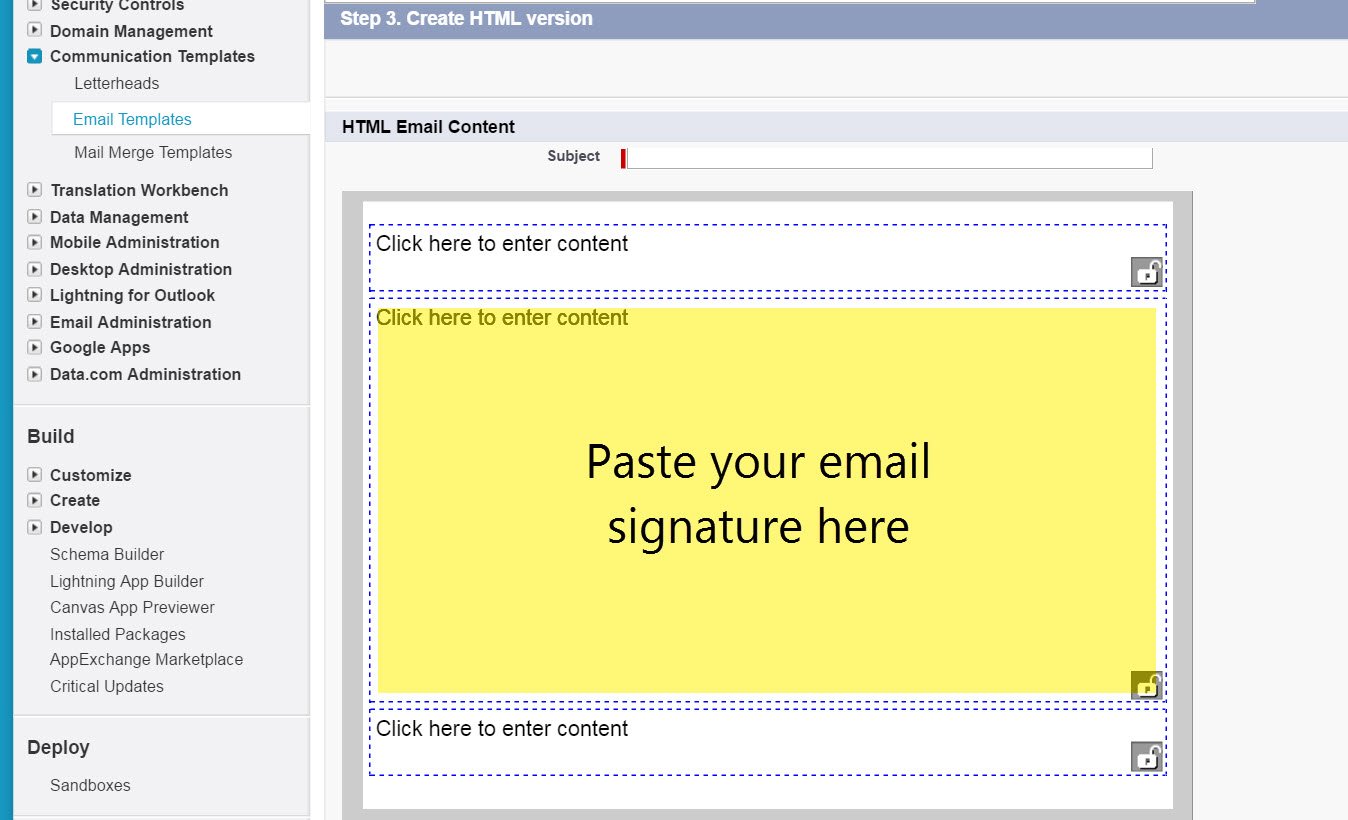
Now go back to Salesforce. You will see a subject field, in Lightning Force UI you're required to add a subject for your Email Template. Add whatever you like, but just remember to change your subject before sending your emails. Once you have added your subject, paste your email signature using Ctrl + V in the middle box as shown below.

10Step Ten
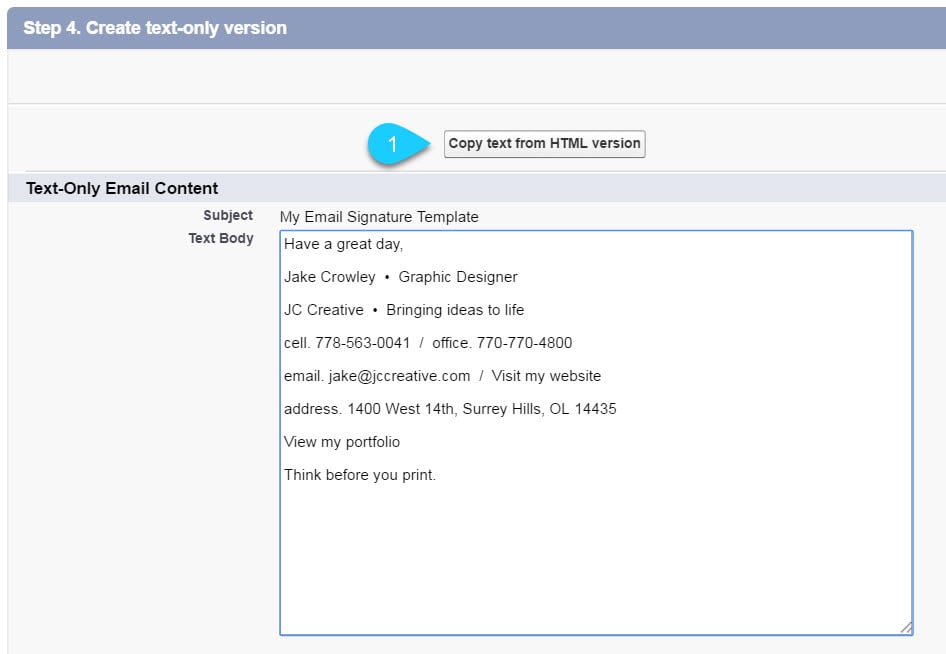
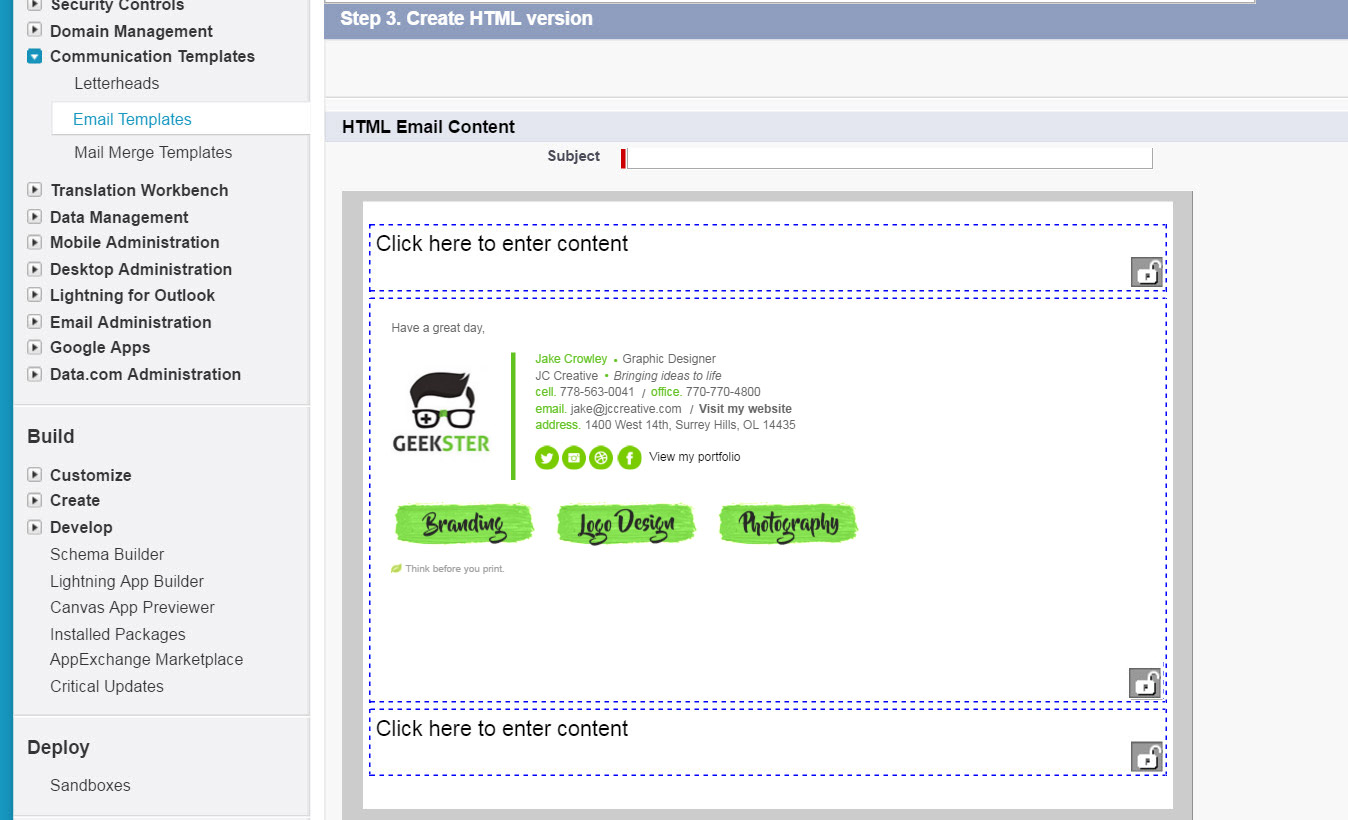
Once you have correctly pasted your email signature and selected next, you should see text-only version. Select Copy text from HTML version and change any text if you wish.
Congratulations! Your email signature is now installed and ready to use!
Install: Step-by-Step Guide - Classic UI
1Step One
Login to your Salesforce account and create a new Letterhead. To do this, select Setup from the menu at the top right of your window.
2Step Two
From the menu on the left hand side, underneath Administer select Communication Templates then Letterheads. You may see a screen that says Understanding Letterheads, click Next on the right-hand side..
3Step Three
Create a new letterhead. Give it a label and a name and make sure to tick the Available for use checkbox.

4Step Four
Edit all of the available options including the Header, Footer, Top Line, Middle Line and Bottom Line and make every color white or #FFFFFF in the boxes available. Set the Height (in pixels) of the Header and Footer to zero. This is important as you don't want any extra lines or colors on your nice email signature! Now save your letterhead.
5Step Five
Now that you have a Letterhead you can build your Email Template. Click on Email Templates located directly underneath Letterheads in your left side menu. Select My Personal Email Templates from the dropbox box, then click New Template to create a new one.
6Step Six
Choose HTML (using Letterhead) from the options.
7Step Seven
Choose the Personal Email Templates Folder, tick the Available for Use checkbox, give your template a new name and unique name, make sure to select the Letterhead that we just created and under Email Layout and select the Formal Letter option. Finally, select Unicode (UTF-8) as the Encoding option, this has the widest compatibility of all of the options and is what our email signatures use. See image below for exact requirements.
8Step Eight
Switch out of Salesforce and open you email signature in your web browser. Once open, press Ctrl + A to select all, then Ctrl + C to copy the signature.
9Step Nine
Now go back to Salesforce. Paste your email signature using Ctrl V for PC (Command V for Mac) in the middle box as shown below.
10Step Ten
Once you have correctly pasted your email signature you should see it like below. Give your template a subject and save.
Congratulations! Your email signature is now installed and ready to use!
Troubleshooting: FAQ
If you have tried our Step-by-Step Instructions for installing your email signature in Salesforce and you run into any issues, please read through this troubleshooting guide before contacting Support for further help.
My email signature doesn't look right when I paste it
More than likely, you have missed copying some of the code. Try pressing Ctrl + A to select all, then Ctrl + C to copy instead of using your mouse to highlight it.
I am composing an email and I can't click on any links or social media icons
In compose mode, most email programs won't allow you to use the links in your email signature. Check to see if your email signature has been installed correctly by sending a test email to yourself instead. The links and social media icons will work when you receive the email.
Still experiencing issues?
Find more answers to Salesforce signature installation questions here.
If you're a member of Email Signature Rescue, you can submit a support ticket to our friendly support team through your member account by pressing the red help button. If you're not a member and need help creating or installing your HTML email signature, consider joining Email Signature Rescue for assistance.
Troubleshooting: Where do I find my email signature HTML file?
Finding your email signature HTML file
- If you are an Email Signature Rescue member and are logged into your account, you can download your HTML file directly from your Dashboard, by clicking on the Download button.
- If you have been emailed your HTML file, go to the email and open the file in your web browser.
- If you have your HTML file saved on your computer hard drive, navigate to where you have saved the HTML file and open with your web browser.
Troubleshooting: I don't have an email signature HTML file
If you don't have an email signature HTML file, consider joining Email Signature Rescue now and get creating! We offer over 20 professionally designed and tested email signature templates, tools and features to create and manage your email signatures online and a whole lot more.